June 2011 – Making doll boots This month I would like to share with you how I make doll boots for the Himstedt dolls. This is the process I use and by no means is the only way to do it. My first challenge was getting a working pattern. Drafting a pattern is somewhat of a trial and error process, at least for me. It seems that as much as I try to measure curves and get it all mathematically correct, somehow it just doesn’t come out exactly as I want, at least the first time, sometimes even the second time! It can be helpful to take an old pair of boots apart and use them as a pattern and then alter from there.
Once you have a working pattern, you cut all the pieces out. I used a material that looks like leather on one side and the back side is flannel. I traced my pattern onto the flannel side using a blue disappearing ink pen. The inner soles are cut from heavy cardboard from outer boxes of popcorn, cereal, etc. I love to recycle in this way. The outer soles for this boot were cut from chip board. They are very difficult to cut out because of the sturdy thick quality of chip board, but it makes a nice shoe sole. I cut the pieces out carefully for assembly.
I marked the buttonholes with the disappearing blue ink pen and made the buttonholes on my sewing machine using a leather needle to sew with and heavy duty sewing thread.
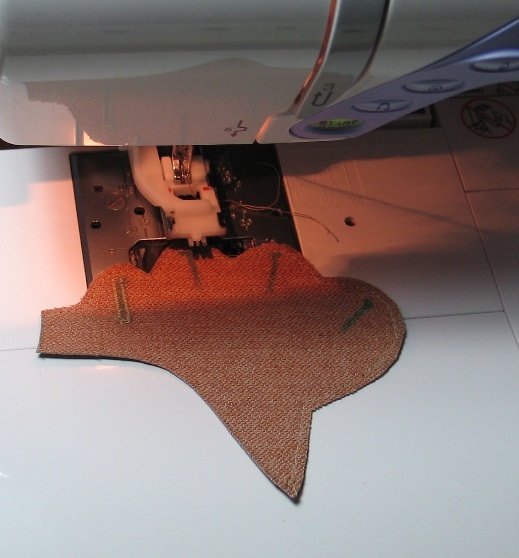
 I did the top stitching around the edges and then sewed the heel part to the upper boot section.

Before sewing the right side of the boot, I marked the button holes with a silver marker.
I then sewed the left side of the boot to the right side of the boot, creating a center seam. I top stitched along each side of the center seam to hold the underside seam allowance open.
Then I sewed each button on by hand and put them through the buttonholes to make sure they were in the correct position.
With this material, I can pin the toe section to the upper boot. If you were to use real leather, the pin holes would show, so they would have to be glued down, wait until the glue dries, and then sew the toe section on.
Once the toe section is sewn on. the next step is the back boot seam. I also top stitch the material on the under neath side to flatten out the seam. I trim close to the top stitching on the under side. I cover the inner sole with white muslin and glue it down.
This is a picture of the underside of the seam after I have top stitched and then trimmed the seam allowance back to the stitching.
Then I glue the boot to the inner sole with the bad side down, muslin side up. I use lots of small wooden clothes pins to hold it in place while the glue dries.
I used Aleen’s Brush on Tacky Glue but I’m sure any brand of glue will do. Once the glue was dry, I took off all the clothespins.
I then glued the upper sole to the bottom sole (chip board). Once it is dry, I remove the clothes pins and the boot is ready.
Painting the sole of the boot is optional. Some I do and some I don’t. If it is going to stand out, then I paint it. On these black and white boots, I chose to paint the sole with some craft paint to match the black leather material. I then put a sealer over the paint once it dried.
Here are the boots from the front:
I am in the process of having this boot pattern produced. The pattern will be for sale on my website in the “For Sale” section. Below are three pairs that I have made in the past.
Here is a picture of Ilsa modeling the boots that were made in this demonstration. I did this as a special order for a customer who wanted an “Ann of Green Gables” type outfit with boots.
 I have made foot wear for the dolls before, but they all had “soft bottoms” that were made from the same fabric that I used on the shoes and boots. This was my first attempt at making the boots with a hard bottom made from the chip board. I’m still learning and have drafted a three strap shoe that I am currently tweaking until I get it right. So, more to come at a later date. Thanks for reading my blog.


